

Last Updated: 2018-01-15 01:52:24 (k73sk)
| Population | Buildings | Item Count (View child page for items list) |
|---|---|---|
| 0 | 0 | 35 |
With the Sewers being like a plain old maze, the Kabel Ruins act more as a puzzle labyrinth. It's a straightforward path, but some puzzles will confuse players at many times. The Kabel Ruins are visited twice throughout the game, just like the Sewers, except that the Kabel Ruins completely warp in appearance the second time, as it appears the people in Doplin Castle must have caught up with the break-in to the castle and fixed the ways the Kabel Ruins are laid out.
Like the Sewers, A guide has been provided below for the players to go through them without having to worry about complications.
Follow the path into a room with 4 green pedestals. Simply light the northeast pedestal and the door will open. Follow through the door and onto the path until it finally leads you to a dead end wall. Break the wall with Galea to continue. At the fork ahead, go through the door to the left. In here, having the left pedestal will open the left door, the right pedestal for the right door, both to close all doors, and neither to exit the room.
After you grabbed those two items, go down the steps to your left to find a room with a chest inside. After grabbing that, go back to the fork and continue east until you see a door. Don't go inside, first go south to the next fork, then down those stairs. Once again, skip the door (a completely empty room) and go south, following the path south and then east until you find another door...This time enter it. Inside this room, use Galea on the pedestal and you'll have access to the two chests.
Now head back to the previous door... And then the previous one before that (should be at the first door you skipped). Go inside the door now. You should be in a room with 9 pedestals, a chest, and a plaque of a fish in the northern part of the room. Change to Maya and use her origins to spell out all the pedestals in order, "F-I-S-H." The door to the north will open and you can continue.
Keep going north, but stop when you see two statues of skeletons. Use Galea to break them apart (unless you want to be ambushed by some Bone Warriors). Continue until you see a door. There's actually 3 doors. Keep going east until you run into the 3rd door, and go inside it. Stand on top of the very top of the three platforms on the east side of the room to open the door. Grab the chest an continue back out of the room. Now enter the farthest west door (center door is an empty room).
Once again, another puzzle room! No problem, it's rather easy. The stone on the floor says, Nearer is clearer, distance obscures. This is the way of the world. Think about it - Use Galea on the pedestals at the end, and start lighting the ones in the beginning of the room with Rivas. Enter the next room, camp out, make sure the heroes have a full belly, and save the game. The next room is going to be interesting. Watch the cutscenes and finish everything off until the player has control of the map again.
Once you've entered the next room, and defeated the boss, Slogar; you can continue north (or first heal at the camp site in the previous room). Once you've headed north, you're going to find yourself in another hall. The first door contains a desk with two items in it, so don't hesitate to stop in and grab them.
Head back out of the room and go west. Ignore the first door you pass by, for you will come back to that soon. Once you've reached the area with a bunch of skeleton statues, use Lang's Origin to smash them all up. Otherwise you're going to find yourself ambushed by skeletons from every statue you pass by. But wait, before you think, "let's head into the next room", try using Lang's Origin on the wall to the left of the center set of statues. You'll find a secret path to a chest containing a Revival Bottle. Now head into the room and you'll find four pedestals with a script at the top that reads There is an order to everything The answer to the puzzle, you ask? North East, South West, North West, South East. Use Maya's Origin, of course. Head north to grab the item, and now head back to that room we last ignored (after the boss with Slogar, naturally).
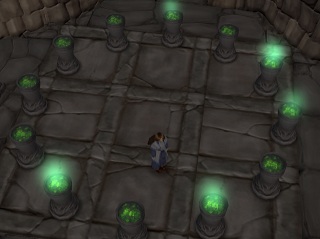
If you read the <Adventurer's Log 2> from the previous room you were in, you'll find that the order of colors are written on the log... Rather simple, to be honest. The order is Yellow, Indigo, Red, Green. Heading north, you're going to find yourself at a cross intersection. First you want to head north, to enter the room and grab the <Adventurer's Log 3>. Afterwards, you're going to head east because going west will eventually lead to a dead end. After heading east, you're going to find a room with a bunch of pedestals. If you read the notes from the <Adventurer's Log 3>, you'll find that you have to follow the pedestals in clockwise/counter-clockwise movement. Starting from the lit torch, move according to the notes (7 to the right, 4 to the left, 2 to the right, and 15 to the left). The final result should look like the picture to the right. Now head north, grab the two chests and now head back to the room west of the cross intersection (not too far west, just the room right in front of you guarded by two statues).
This will be the last puzzle you'll deal with here. If you read the plaque against the wall, it says 'The clock shows 3 o'clock'. Shouldn't be to hard to guess, should it? Simply light the pedestals from the opposite ends (left and bottom) to create a shadow for 3 o'clock! Now head north and go through the gate to exit the Kabel Ruins! East and west are pointless here.
The second time going into the Kabel Ruins is more headache worthy than the first time. The puzzles are increased in difficulty and it seems to take forever to go through the maze the second time.
After watching the cutscene, head across the platform to the east. Follow the stairs down to the north and then east, and finally north again - into a room where you'll find a Prison Key. This will be used later in Doplin Castle to open some locked chests.
Head back up the stairs, going north. At the top of the stairs, skip the first northern door - head west, and go north at the next door. Go through the following room by lighting both pedestals with Maya and go north.
In the first puzzle room, you'll see 4 switches and a bunch of boxes. The boxes are what provide the hint as to the order of the switches that must be stepped on. Step on the switch with one box, the switch with two boxes, and then the one with three boxes. The door will open and you can continue into the northern room. Don't forget to plow through the boxes with Lang's Origin for items. Exit the room, go west, and break through the thin wall to the north with Galea. Destroy the two statues with Galea and then light the pedestals in front of the chest before opening it - this keeps the Bone Warriors from attacking. From here, continue south until you reach the ladder. Drop down, go into the next room, and grab the chest. Finally, continue back towards that ignored northern door mentioned earlier and enter it.
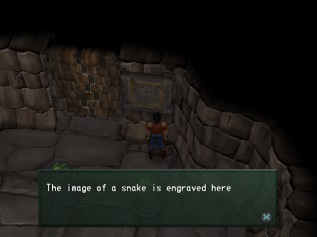
The next puzzle, which will show an image of a snake on the wall, has given a hint from the <Explorer's Notes 1>. It mentions that "it" seems to be the opposite... So instead of spelling out S-N-A-K-E with the pedestals, simply light all the ones that do not contain letters in Snake. So this means you'll light the pedestals Q, L, U, and W.
After this puzzle, exit the room through the north and head down the east path - ignore the elevator for now. Continue through the hall until you reach a door. Enter the room and start with stepping on the left switch. Grab the chest and step on that switch in there. Then go back out and step on the eastern switch... Step on the switch in that room, and then finally come back out and step on all the switches in the main room to deactivate them. Step on the new uncovered northern switch and claim the two treasure chests. Now head back to the elevator.
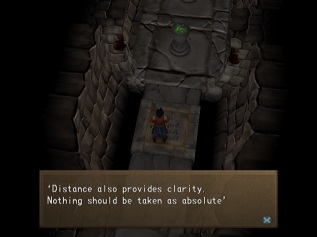
Down on this new floor, have Sharon blast the switch with her Origin to raise the platforms to the sides. Grab both chests and then go up the northern elevator. The northern door has a Blind Cure, so grab it and then head down the hall to the left and enter the next door. The next room has another puzzle with the hint (on the floor), "Distance also provides clarity. Nothing should be taken as absolute." All this is basically saying is to keep the farthest pedestals lit. So you're going to make sure the two closest pedestals are extinguished and the last two are lit with Rivas. The door will open and you can continue into the next room where you can camp, eat, rest, and save and then continue!
After resting, continue north and pass the battlefield room where you previously fought. In the following halls, ignore the first door, continue west (skipping the first closed door you see, you'll come back to that later). As you continue, you'll eventually find a path where you previously walked through and destroyed some statues. Continue to the room to the north to find another puzzle. The hint on the wall says, "Once here, not there". The order that seems to work is: top right, bottom left, top left, and then bottom right. All you have to do is hit two opposite corners and then the other two opposite corners. Grab the chests and go back to the room that you were told to skip.
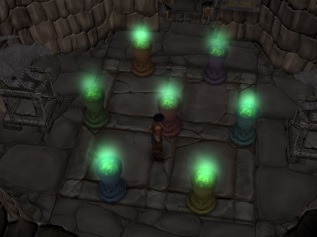
Although this puzzle seems like it's hard, it's really not as hard as you may think... The hint provides us with the order of "Red, Orange, Green, Blue..." and stops there. Unfortunately, these colors are not completely in order (notice how it has ellipses in the notes). But, looking at the colors, it should be noted that it's the color of the rainbow! Simply lighting the pedestals in the order of the rainbow will provide you with the answer: Red, Orange, Yellow, Green, Blue, Indigo, Violet... Tada! And now you have the result as in the screenshot to the left.
Continue into the next hall and head west until you find the switch. Hit it with Arrode and go across the new path. You'll notice some torches on the walls - if you want some extra experience, light them with Galea and battle the monster called Inferno. It's a tough battle, but they're good for experience if you want some! In the meantime, go through the northern door to get the <Explorer's Notes 3>. To get it, you'll need to use Galea twice on the center row and once on the right row. Once you're done in this area (and grabbed the chest in the candle room), head back out and go as far east as you can and enter the unopened door. You'll find a room full of pedestals and a rat statue with the note, "'First from the North......' The rest has been worn away". The room is designed like a clock (notice 12 "hands") and simply needs to follow the <Explorer's Notes 3> found earlier. You're going to need to light the unlit pedestals and extinguish the lit ones in the following order: 8 (o'clock), 4, 7, 3, 8, 1, 5, and 12. This should open the door - if it doesn't, leave the room and try again because the order was incorrect or you missed one.
In the next hall, light the switch, blast your way through the skeleton statues, and instead of going north through the gate, go south and enter the door to another puzzle room. The hint on the wall here says, "'At 9 o'clock, we were nowhere near being done, and before we knew it, a new day had arrived". First light both the bottom and right torches with Rivas to get the 9 o'clock set. After the pedestals light up, extinguish the right torch to make "a new day" (noon). Head through the new open door and grab the chest. Head back out, and before exiting (again), head west. Light the switch with Arrode and follow the hall to the next room. Here you'll find four chests! Awesome! And now, you can exit the Kabel Ruins once and for all through the gate.